
70″ to 66″ Hickory Flat Bow (The Hickory Stick)
In my quest to make my self-bows more efficient, I’ve been reading, asking anyone who may listen and trying different ways to get my hunting arrows to go faster.
This bow is finally one shooting a little above average (based on the Traditional Bowyers Bible) , so I’ll try to document what I think I did to improve on the previous self bows.
First, I know the lack of patience is part of my problem. I try to hurry everything along from drying to tillering. With this bow I decided to always move to a different project every time I thought about hurrying. Just sit it down and walk away for a while.
With all my bows, I leave them long knowing I can cut them down later if I have to. I’m not sure if that matters, but I think a longer now is easier to tiller. Oddly this one started at 70″ and ended at 70″. (recap: see below)I think that’s a good step in the right direction.
Not only was the moisture content down to about 7.5%, but I kept it in the hot box when I wasn’t working on it. To dry it I weighed it as well as using a moisture meter. It was in the hot box until it stopped loosing weight. Because of my schedule, it had actually stopped losing weight for about a week. Depending on your hotbox setup, you need to be a little careful if your temperature si to high and relative humidity to low, you can dry a stave to much. I used a meter as well. Some say 7% is to low. I don’t believe it is for hickory. Below that and it would likely be to dry though.
I forced myself to learn the gizmo. I know it’s not a hard concept, but there is a lot of conflicting information about it. I have a separate tillering stick which makes the gizmo easier to use. By not having the tillering stick as part of the tree, I can move it. I can flip the bow around if it want, or lay it on the floor. I will often lay it on the floor, draw the online on the concrete, and flip the bow to make sure I’m bending the same. I do this at whatever draw length I’m currently at for the draw weight I’m shooting for. I believe this helps, and adding the gizmo, I can get a more consistent bend.
Part of learning the gizmo is to know it’s not the end all, be all, but it’s an additional tool in your arsenal.
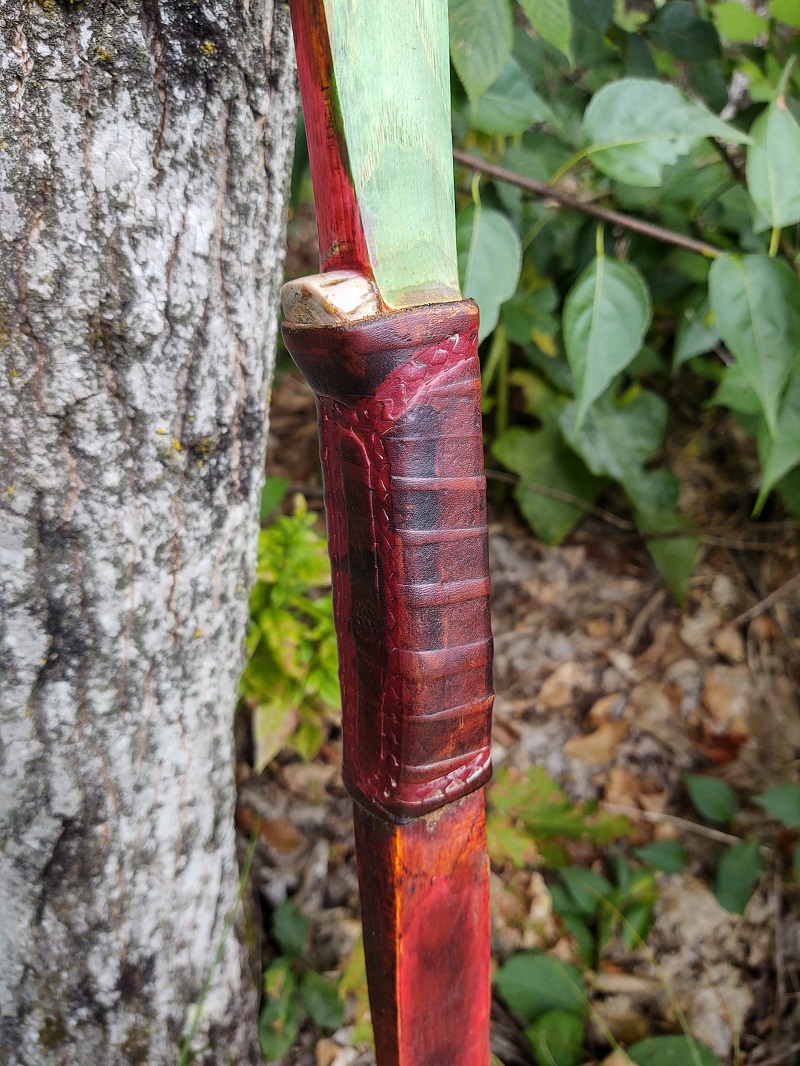
I left the last 6″ or so stiff of each tip for this bow, which seems to be the normal process for most bows.
I still don’t really understand how to apply the mass principal from the TTB (Traditional Bowyers Bible Vol 4 by Steve Gardener), but I believe it’s important to keep it in mind. I believe it also helps when combined with the moisture content control. The table showing the weights on page 92 is sometimes hard to apply, but keeping the weight in mind will help. It’s a good indication of when to remove wood from the sides instead of the belly.
Have I mentioned I forced myself to be patient?
I used no set tillering (here at primitive archer—> ). The difference for me on this bow was I pulled to final draw weight each visit to the tree. Never over the weight, but to it. Does this matter? I don’t know. I guess more experience will tell me.
A lot of bowyers suggest waiting until the bow is shot in to start finishing it. I changed that strategy. I started finishing as soon as tillering was done. I hadn’t even forming the handle. This should help with moisture control when the humidity is high. This may be different for you, and I believe it will be different for my shop when the wood stove is running. I believe the need for moisture control will be different for everyone and different at different times of year. It’s also dependent on weather. So pay close attention to it.
I figured if I started adding a moisture barrier early, it will help. Yes, it’s a little extra work, especially if you wind up scraping part of it off and reapplying it, which I did several times for this bow, but it’s a minor inconvenience, and if it helps, I’m all for it, and either tru-oil or spar varnish will dry enough to be back working on it in an hour, so we’re back to….be patient, but it doesn’t really slow me down much..
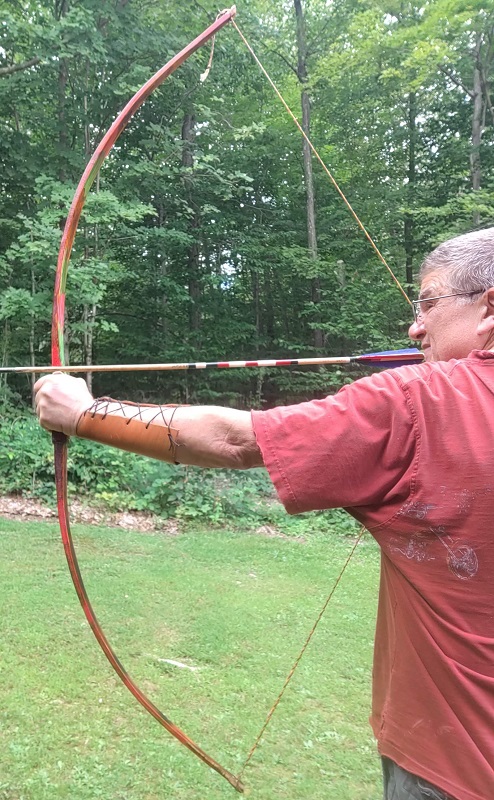
Part of my final tillering is always taking a picture and video of the final tiller at full draw. With a picture I can crop it, enlarge it, and I see inconsistencies I don’t see on the tillering tree. I use the timer on my cell phone to take the picture.
I also start shooting the bow once I’m at 2″ below my 28″ draw length. At first I marked arrows at 26″, but now I know where that short draw is. I still usually loose weight after shooting. Some say it’s normal, some say it is introducing set. But I haven’t figured out how or even if it’s possible to stop it. We’ll have to see if I can reproduce another efficient bow and what I learn from the next one.
Note as well, this bow lost very little weight from tillering to being shot in. Keep in mind my article on a self bow loosing draw weight at each shot. Don’t confuse this with actual weight loose.
But, the story doesn’t end there. More of the story below.


Chronograph Results
Name: 6-640 ave gr Arrow 70″ Hickory
Shots: 6
Average: 150 ft/s
SD: 3 ft/s
Min: 147 ft/s
Max: 155 ft/s
Spread: 8 ft/s
Barometric Pressure: 30 in Hg
Temperature: 66 F
Name: 6-640 ave gr Arrow 70″ Hickory
Notes: 49.8# draw weight
Shots: 6
Average: 153 ft/s
SD: 5 ft/s
Min: 147 ft/s
Max: 158 ft/s
Spread: 11 ft/s
Barometric Pressure: 30 in Hg
Temperature: 66 F
Name: 6-640ave gr Arrow 70″ Hickory
Notes: 50.3# draw weight, slight increase from last 6 arrows
Shots: 6
Average: 149 ft/s
SD: 5 ft/s
Min: 142 ft/s
Max: 157 ft/s
Spread: 15 ft/s
Barometric Pressure: 30 in Hg
Temperature: 66 F
Name: 6-640ave gr Arrow 70″ Hickory
Notes: 50.3# draw weight, no increase from last 6 arrows
Shots: 6
Average: 154 ft/s
SD: 13 ft/s
Min: 144 ft/s
Max: 183 ft/s
Spread: 39 ft/s
Barometric Pressure: 30 in Hg
Temperature: 66 F
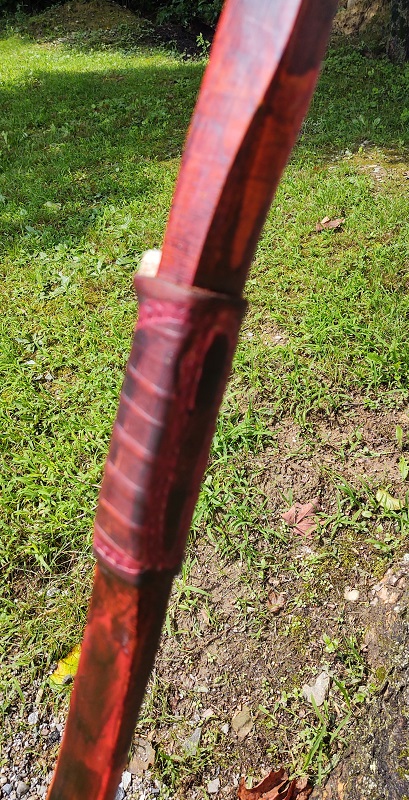
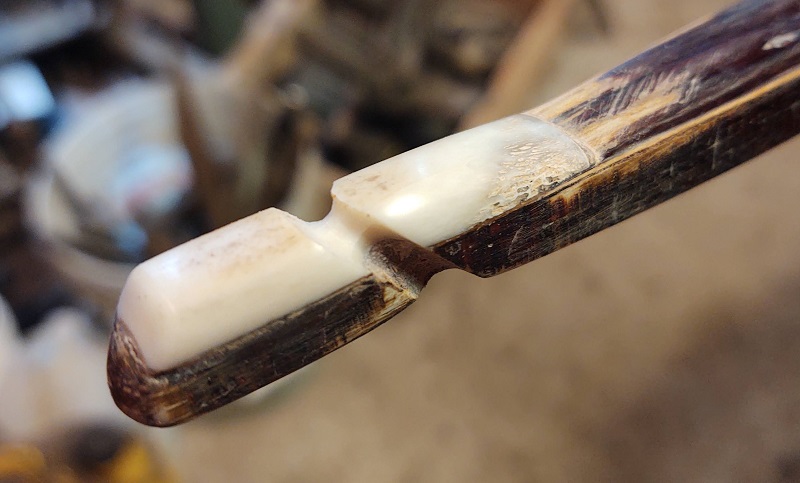
After about 500-600 arrows, I noticed the string was starting to wear into the bow so I added some bone overlays

retillered and piked to 66″
After about a month of shooting almost every day and what I figure was around 3000 arrows, one day I strung the bow to shoot and to my great disappointment, the bow had lost the nice tiller and had a huge negative tiller.
But not to give up, I retillered and piked the bow to 66″ to gain back the 50#
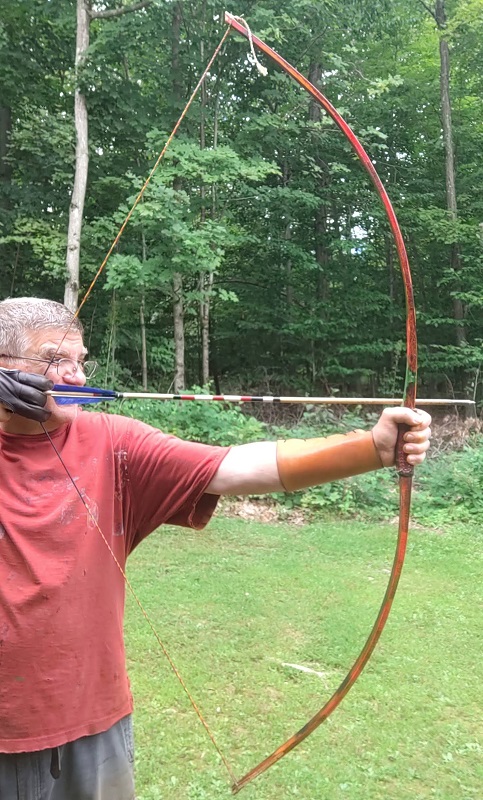
It Didn’t loose any of the speed or accuracy and I’m still shooting it. It will most likely be chasing whitetail with me this fall.
Here is a similar discussion on primitive archer http://www.primitivearcher.com/smf/index.php?topic=22921.0
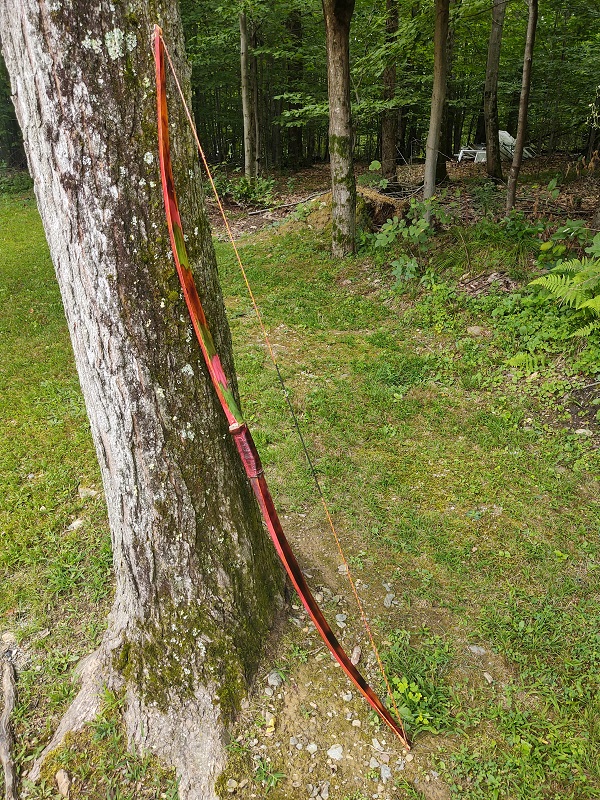
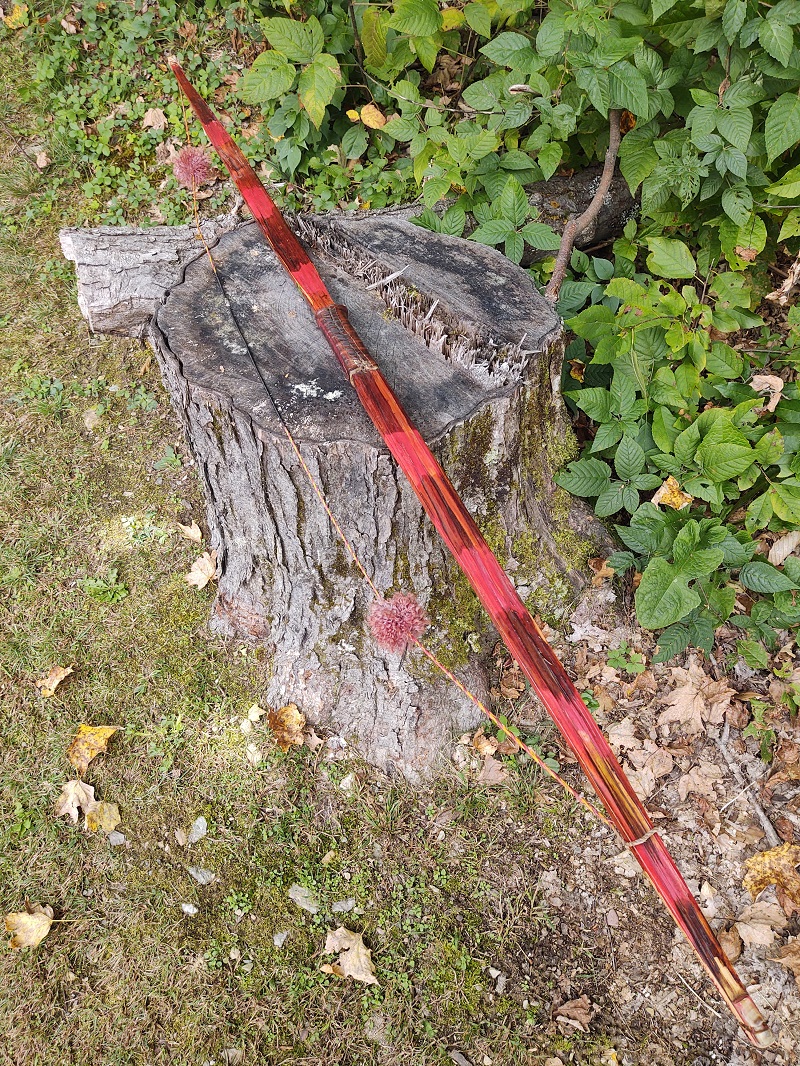
Also notice I added a little green fiebing’s dye this time to the camo pattern.
This is after the retiller. Still at 50#@28″ and still shooting a little above average speed with 10gpp arrows.

And since this will be my bowhunting bow, I added the quiver. Although I decided to go with a side quiver to start.


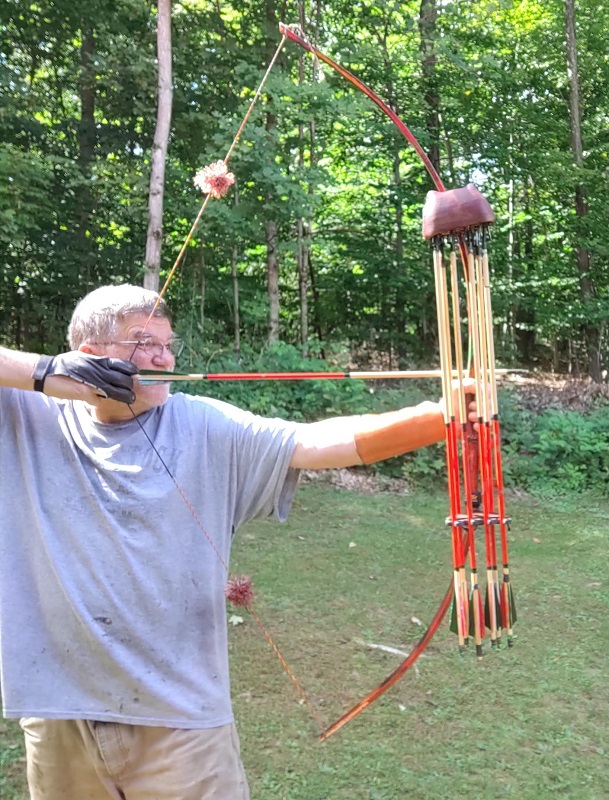
In the end I decided against the bow quiver and went with the Side Quiver.


Final weight with handle installed 22.8 ozs
70" to 66" Hickory Flat Bow (The Hickory Stick)
https://www.diy.timetestedtools.net/70-to-66-hickory-flat-bow/49#@28". 66" Tip To Tip Current average speed with my 650gr arrows is 153fps.
The dimensions in the follow start at the end of the handle for each limb. (see handle image above)
| 0 | 2 | 4 | 6 | 8 | 10 | 12 | 14 | 16 | 18 | 20 | 22 | 24 | 26 | 28 | 30 | 32 | |
|---|---|---|---|---|---|---|---|---|---|---|---|---|---|---|---|---|---|
| Thickness | 1.03 | .74 | .65 | .57 | .52 | .51 | ..50 | .47 | ..47 | .46 | ..45 | .42 | ..40 | .43 | .41 | .42 | .43 |
| Width | 1.06 | 1.26 | 1.39 | 1.42 | 1.41 | 1.39 | 1.38 | 1.33 | 1.30 | 1.24 | 1.15 | 1.04 | .95 | .87 | ..74 | .62 | .52 |
________________
As an Amazon associate, we earn income from qualifying purchases when you click on a link. Your link clicks help us fund our website.________________
[…] for this area. I’ve made that shot across that very field with a rifle before. But with my hickory stick and poplar arrows, all I could do was gaze at the spectacle and dream.The next day I came back to […]