
DIY Hunter’s Pack Seat (Take Two)
See all DIY Hunting seat versions —->
As I said before, as with most hunter’s, I am constantly trying to improve my gear. One of my primary objectives though, is to make that gear myself whenever it makes sense. This seat is no exception. It took a bit of research and trial and error to get it right, so I thought it might help others who like to hunt on the ground and are looking for a good, comfortable, portable hunting seat.
This is a revision of the first DIY Hunter’s Pack Seat I made. That first one worked well, but as I was using it I began to realize i would use it more if I didn’t have to take the backpack off to sit down. So I started thinking how I could make that work. I thought about it as I sat on the DIY Hunter’s Pack Seat and I thought about it in my sleep. I came up with this. The first two i made also work, the DIY Tree Seat **Improved Version** and the DIY Tree Seat (Like a Saddle for the Ground Hunter). They are much simpler to make, but not as versatile.
This one took me a good 4-6 hours to make with a second day of tweaking for another couple hours.
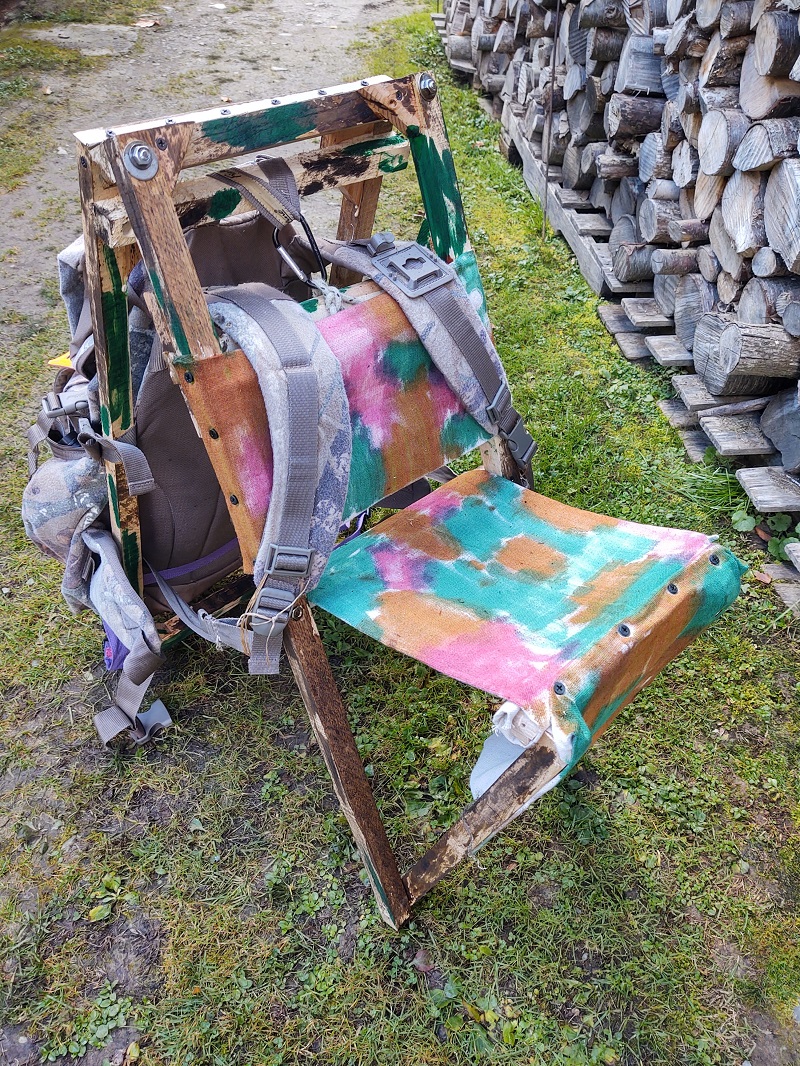
It works sitting on all 4 legs or leaning against a tree of blow down.
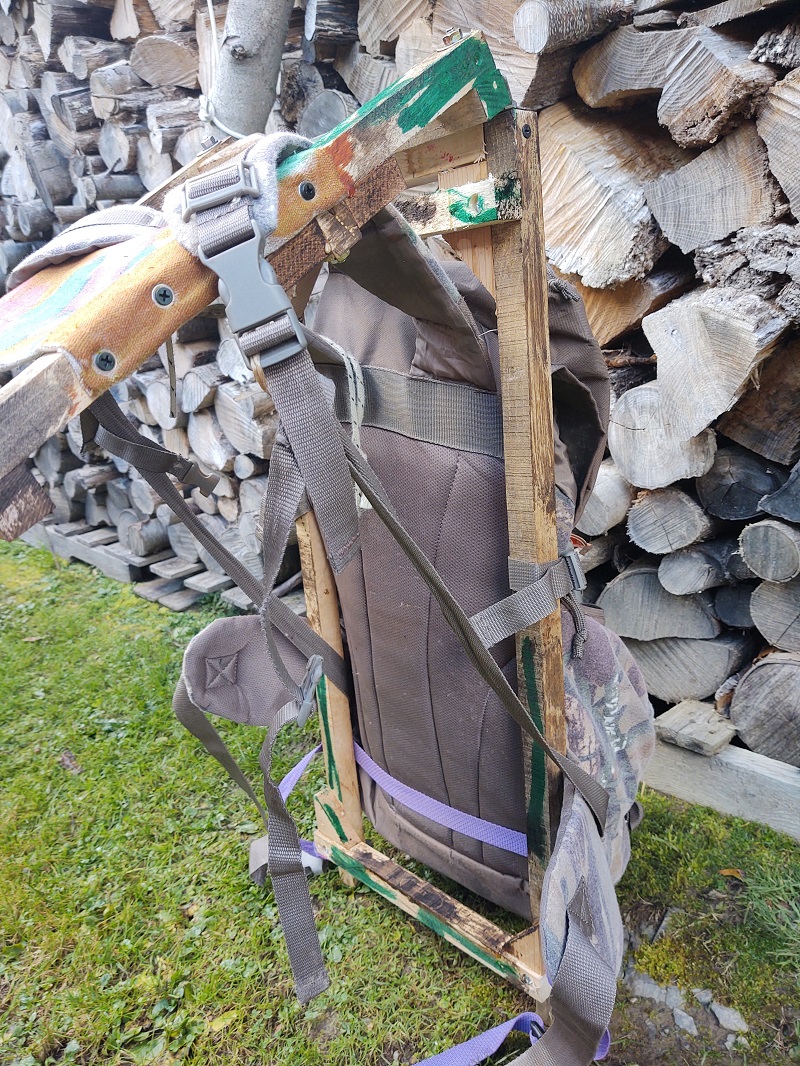
Once again I started with a separate set of shoulder straps and wound up going back to the backpack straps. The backpack can still be easily removed (although I doubt I ever will) but one shoulder strap doesn’t snap, so it means removing the strap out of the buckle and rethreading it to put it back together.
The purple strap (off an old life vest) just hold the leg up if it’s carried by the backpack handle.
The DIY Hunter’s Pack Seat (Take Two) is also a few ounces lighter than the other version at just a tad over 5#. (without the backpack of course)
As with the first one, the seat is made from 100% of material I had in the shop. The poles are actually the lumber stickers used to stack my green lumber off the sawmill, some canvas left over from the target project, and a piano hinge from I don’t know where.
The canvas is just fastened by folding it over to double or triple it and fastened with 1″ sheetrock screws and small washers.
The canvas is dyed with Fiebing’s leather dye and the wood is stained with some left over stain that’s been in the shop for 30 years or so. All just to help concealment. I did a lighter spot/camo type wood stain so it wasn’t quite so consistent and dark as the first one.
It’s the same dimensions as the first one, should you plan to copy it.


Update to the DIY Hunter’s Pack Seat (Take Two)
Although it was probably already the most comfortable portable seat I’ve tried so far, I decided to add about 2″ to the length of the seat for just a tad more comfort. and I was asked a few questions so I’ve added a few pictures for detail. While I was adding to the seat I added some reinforcement web. I don’t know if it’s really necessary, but I had it, so as I was working on it I went ahead and added it.
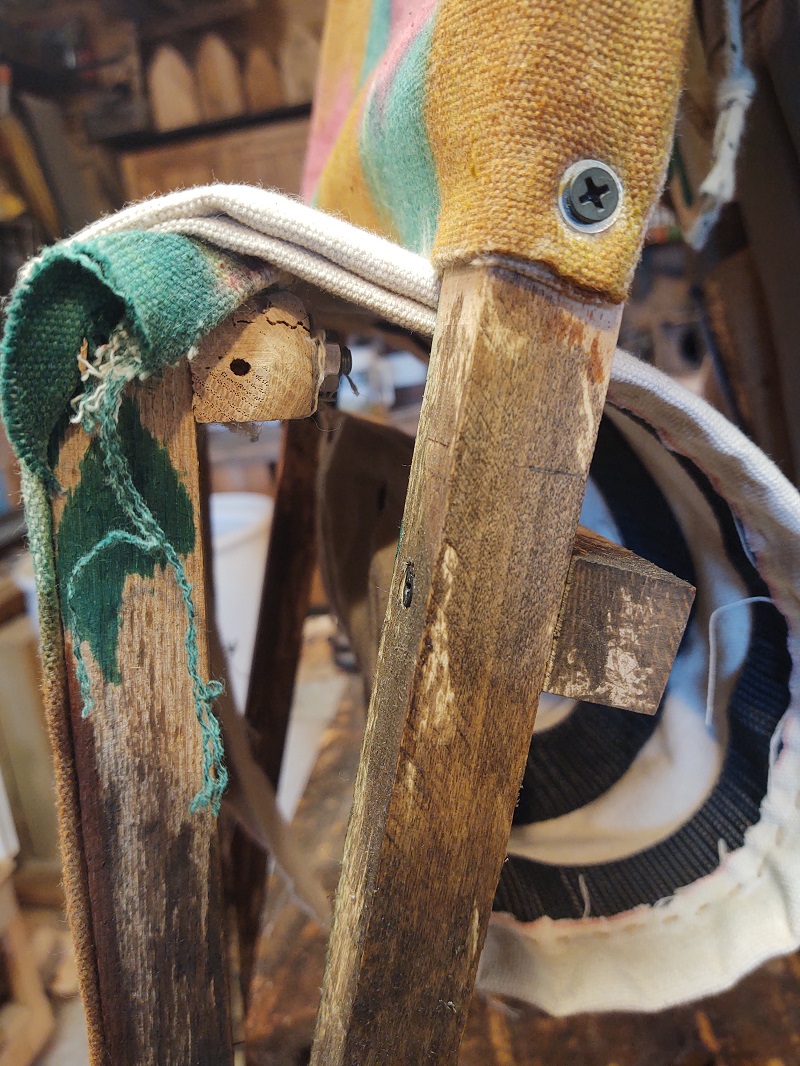
I’ve also been working to knock the corners off the 1 x 1 frame, more for esthetics than anything, but it will help when grabbing it to move it around. If I build another I would hit the corners of the 1x with a round over bit or a block plane.
Note in this first picture the cross support has been taken off. You can see it in several of the images though and I slightly changed the way the canvas was fastened in the front since it was supported with the web. Before this modification it was wrapped around that cross support. I still think that would have been strong enough, but I tend to overbuild.


________________
As an Amazon associate, we earn income from qualifying purchases when you click on a link. Your link clicks help us fund our website.________________
[…] Update: see a later version here DIY Hunter’s Pack Seat (Take Two) […]